Adaptive Art- Special Education — September 29, 2015

Adaptive Art- Special Education

I teach a Functional Life Skills (FLS) special ed class twice a week for 30 minutes. The class consists of 10 students that are between Kindergarten and 7th grade, talk about a variety of motor skill level! I do have 4 assistance in the classroom with me to help the students (hand over hand) with their fine motor skills. Since I see this group twice a week I usually do Mondays as sensory art and Fridays we focus on the actual production of art by creating a project to take home. Although I was very intimidated by this very diverse group at first, I have grown to love working with each individual!

Here are some things we have done in our adaptive art class!
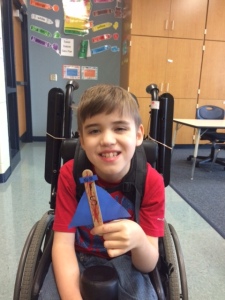
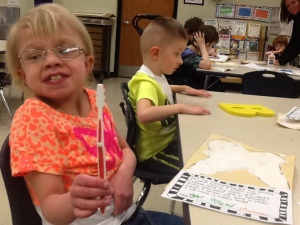
We watched a clip on our iPads about superheros and then created our own superhero with a Popsicle stick. We then discussed what type of super power we would choose if we were a superhero.
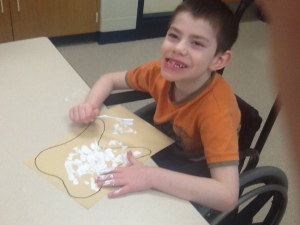
We talked about the importance of brushing our teeth. Students drew a large tooth on their paper and
We talked about the importance of brushing our teeth. Students drew a large tooth on their paper and “brushed” their tooth with white paint.
The kids LOVED
The kids LOVED “brushing” their tooth with white paint, look at that grin!
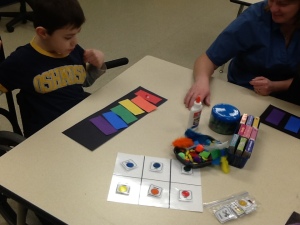
We glued the rainbow colors on a black strip of paper. I then put a variety of materials and colors (pom poms, pipe cleaners, beads, tissue paper etc.) and the students glued the materials to the matching color strip.
We glued the rainbow colors on a black strip of paper. I then put a variety of materials and colors (pom poms, pipe cleaners, beads, tissue paper etc.) and the students glued the materials to the  matching color strip.

In the Video below I covered the tables with white paper and filled the page with different intersection roads. I taped markers to matchbox cars so when the students “drove” the car the marker would drag behind and make a line wherever their car went! This was a big hit, the students were even making “Vroom Vroom” noises!
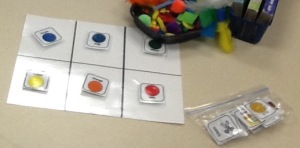
One thing we do at the end of every art class is we use our Velcro mats and review our project. We put on our chart what colors and materials we used in art class that day OR I will have the table chart already filled out so that they know what to expect and what materials we will use that day. 
One thing we do at the end of every art class is we use our Velcro mats and review our project. We put on our chart what colors and materials we used in art class that day OR I will have the table chart already filled out so that they know what to expect and what materials we will use that day.

I really need to improve on taking pictures of my lessons to post and share with you!
I am new to adaptive art so PLEASE PLEASE share any ideas you have with me. 🙂

— September 17, 2015

Have you ever heard of Artsonia?

imagesE18HU39V

It is pretty much the greatest website/app ever! Artsonia is an online art gallery for students to photograph their artwork and publish it to THEIR own folder on the site. The artwork in their folder stays forever from year to year. This is an awesome way for students to share their artwork with friends and family that do not live close to them. Friends, family, and teachers can comment on their artwork for the child to see! Trust me, you will not see a bigger grin on a child’s face than when they receive a comment on their latest masterpiece! Not only is it a way to connect with parents, but a way to visually see the growth in art throughout the years!

Typically, after an assignment is completed the students use their iPads (Yes, I am in a 1:1 district, all of our students have iPads, I am spoiled!) to photograph, crop, add an artist statement, and title

their artwork. The process is SO easy for the students, and to see them be able to upload all on their own is amazing! I have students start uploading their own work in 2nd grade, I haven’t attempted Kindergarten and first yet…

Wanna know the best part?! Grading and assessing student work is a breeze! I no longer have to lug home or sort through piles of large paintings, clay pieces, or sculptures. I just open up the project on my iPad and swipe through all of the photographs and record their grade.

Technology in the Art Room — September 4, 2015

Technology in the Art Room

The talk EVERYWHERE in education is about integrating technology into your lessons in all subject areas including art, yes I said it, EVEN ART! As much as I love the thought of creating art “old school” style with just construction paper, scissors, and glue, students can still use technology to explore their creativity and think outside the box! This doesn’t mean you have to completely cut out the physical production of art, you can just add a technology element to your existing art lessons. I have fallen in love with the use of technology in the art room, so I want to share one way that I incorporate technology in my curriculum.

ChatterKid Self-Portrait- 3rd Grade

Lesson Objective: Students will learn about drawing self-portraits using correct proportions. We will talk about superheros and create a self-portrait using an onomatopoeia.

After the portraits are painted the students will use the app ChatterKid on their Ipad. If you aren’t familiar with Chatter Kids, this app allows you to take a picture of anything, draw a line through it with your finger creating a “mouth” and record yourself talking. The kids took a picture of their self-portrait and drew a line right where their mouth would be and recorded themselves talking. They could tell a story about them saving the day, how they became a superhero, or something else regarding them being superhero. After they were finished recording they would hit the “share” button on the app and email it to me. After I received the emails I uploaded all of their videos to YouTube and created a QR code for each video. You’re thinking, “Wow! that had to of taken forever!” No it actually didn’t, each video only took a few seconds to upload and once I got into a groove of uploading and printing the QR Code I was done in no time! The students glued their QR code on their picture and I put them up in the hallway for parents, teachers, and other students to scan with their QR reader and watch each students artwork come to life! It was remarkable looking out my classroom door into the hallway and seeing visitors scanning the QR codes watching and laughing at the videos. It was well worth the extra time I put into this lesson!

Check out the videos! 

If you want to learn more about this please comment below your e-mail address!